Jalapeno Poppers Recipe: Crispy, Bacon Wrapped and Ready in 35 Minutes
The first batch of jalapeno poppers I baked at one flat oven temperature came out with bacon that was still pale and a little chewy by the time the cheese had already started leaking out the sides. That’s the trap with this appetizer: bacon needs high heat and time to crisp, but cream cheese filling only needs enough warmth to melt and hold its shape, and pushing both through the same setting for the same stretch of time means one of them loses.
This jalapeno poppers recipe splits the cooking into two stages instead of one. The peppers go in first at a lower temperature to set the filling and start rendering the bacon fat, then under the broiler for a few minutes so the bacon actually crisps instead of going limp and gray. No deep fryer, no soggy middles, and the cheese stays inside the pepper instead of pooling on the pan.
If you’ve only ever had these off a restaurant appetizer platter or out of a freezer box, the texture difference is immediate: real jalapeno with some bite left in the flesh, not a mushy shell wrapped around processed filling.
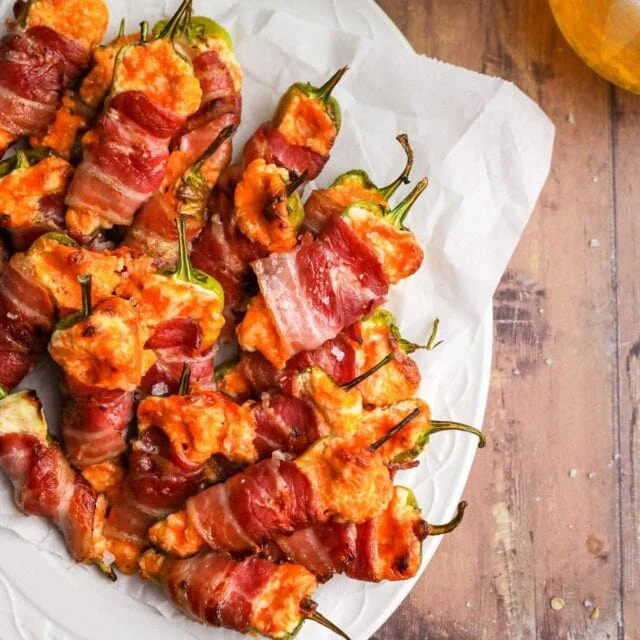
Why You’ll Love This Jalapeno Poppers Recipe
- No deep fryer required. The two-stage bake gets the bacon crisp using just a sheet pan and the broiler, so there’s no oil to heat, strain, or store afterward.
- Holds together on the tray. A snug wrap pinned with a toothpick keeps the filling from sliding out mid-bake.
- Built for a crowd. One tray of jalapeno poppers makes twelve, and it all goes in and comes out together instead of frying three at a time.
- Make-ahead friendly. Stuff the peppers the night before, cover, and refrigerate until it’s time to wrap and bake.
Quick Snapshot
- Prep time: 15 minutes
- Cook time: 20 minutes
- Total time: 35 minutes
- Servings: 6 (12 jalapeno poppers)
- Difficulty: Easy
- Calories: about 180 per serving
- The ingredient that decides the outcome: full-fat cream cheese, softened all the way through
- Best for: game day spreads and potlucks
Nutrition Information
| Nutrient | Amount Per Serving |
| Serving Size | 2 jalapeno poppers (about 100 g) |
| Servings Per Recipe | 6 |
| Calories | 180 |
| Protein | 8 g |
| Carbohydrates | 4 g |
| Fat | 14 g |
| Fiber | 1 g |
| Sugar | 2 g |
| Sodium | 340 mg |
Most of the protein comes from the beef bacon and cheddar, since cream cheese itself leans closer to pure fat. Sodium climbs from the bacon and shredded cheese together, so this isn’t a low sodium snack. The fat is mostly the two cheeses plus rendered bacon fat. Values are estimates that vary with brands and measuring.
Ingredients
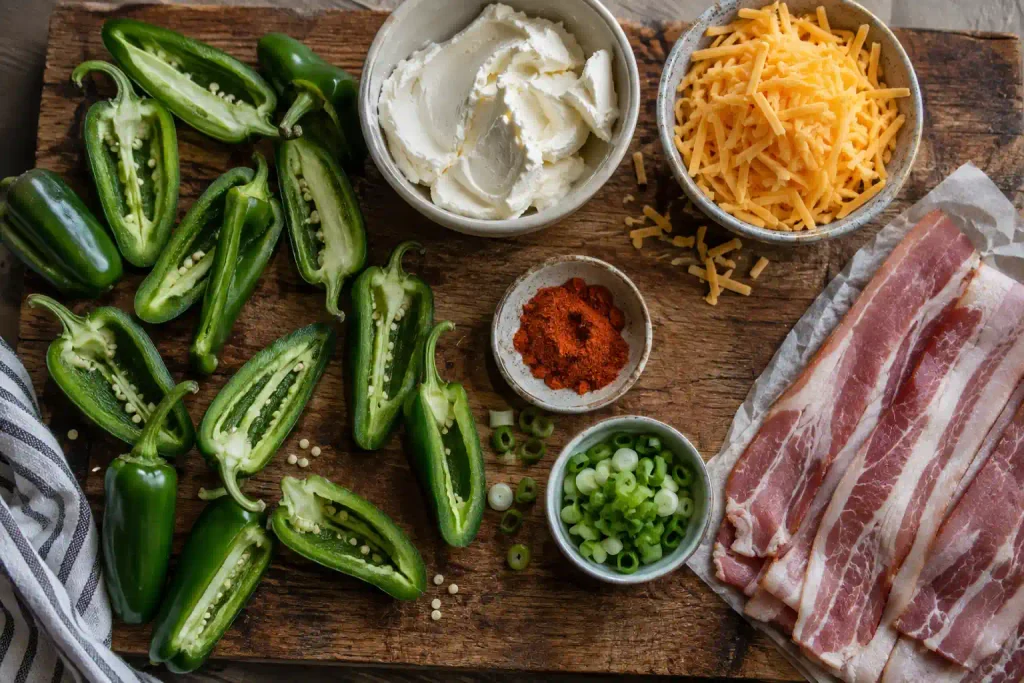
For the Filling
- 8 oz (225 g) full-fat cream cheese (Philadelphia holds up well), softened
- 1 cup (115 g) shredded sharp cheddar cheese
- 1/4 cup (25 g) grated parmesan, which firms the filling so it holds shape in the oven
- 2 green onions, finely sliced
- 1/2 tsp garlic powder
- 1/2 tsp smoked paprika (regular paprika works, but the smoke flavor matters since the filling never sees direct heat)
- 1/4 tsp salt
For the Peppers
- 12 medium jalapenos (about 1 lb / 450 g), halved lengthwise and seeded
- 6 slices beef bacon, halved crosswise (12 half strips total)
- Wooden toothpicks, soaked in water for 10 minutes
Pepper jack works in place of cheddar for extra heat. A lower-fat cream cheese gives a looser filling that needs an extra quarter cup of shredded cheese to hold together.
Allergen and Dietary Disclosure
This recipe contains milk, from the cream cheese, cheddar, and parmesan. As written, it has no eggs, tree nuts, peanuts, wheat, soy, sesame, fish, or shellfish, assuming your beef bacon carries no added fillers.
As written: halal, gluten free, egg free, nut free. Not dairy free and not vegetarian, since beef bacon runs through the whole dish.
For a vegetarian version, swap in a plant-based bacon strip. The trade-off is texture: most crisp less evenly and can char before the filling sets underneath, so watch the broiler closely.
Check the bacon packaging itself. Some cured or smoked beef bacon is processed on shared lines with soy or gluten-based fillers that wouldn’t show up by looking at the meat.
Equipment Needed
- Rimmed baking sheet. Catches the rendering bacon fat instead of letting it run onto the oven floor.
- Wire cooling rack. Lifting the peppers off the pan is most of the reason baked jalapeno poppers crisp instead of stewing in their own grease.
- Small paring knife. For halving the jalapenos and cutting a clean channel along the membrane.
- Piping bag, or a zip-top bag with the corner snipped off. Fills evenly; a spoon tends to overfill the ends and leave the middle thin.
- Kitchen tongs. For turning the tray under the broiler without tearing the bacon or knocking the toothpicks loose.
Preparation
Pull the cream cheese out at least 30 minutes ahead. Cold cream cheese resists mixing and leaves pale, unblended streaks in the piped filling.
Line the sheet pan with foil and set a wire rack inside it, since foil is what catches the bacon fat. Preheat the oven to 375°F (190°C).
Halve the jalapenos through the stem, then run a small spoon down the inside to pull out the seeds and membrane.
Leave the membrane on two or three peppers in the batch if some of your guests want more heat. The seeds carry little capsaicin on their own; the ribs are where most of it actually lives.
Mix the filling completely before you touch a single pepper. Once you start wrapping bacon, sticky hands and a half-mixed bowl of cheese do not go well together.
Step by Step Directions
Step 1. Seed the Jalapenos
Halve each jalapeno lengthwise through the stem into two even boats. Scrape the seeds and ribs out with a small spoon and set the halves cut side up while you finish the rest.
Chef’s Note: Wear gloves or wash your hands right after, and avoid your eyes for the next hour. The oil sits on skin long after the smell fades.
Step 2. Mix the Filling
Stir the softened cream cheese against the bowl with a fork until it loosens, then fold in the cheddar, parmesan, green onion, garlic powder, smoked paprika, and salt. It should hold a peak when you lift the fork out, like stiff frosting, not slump back flat.
Step 3. Fill the Peppers
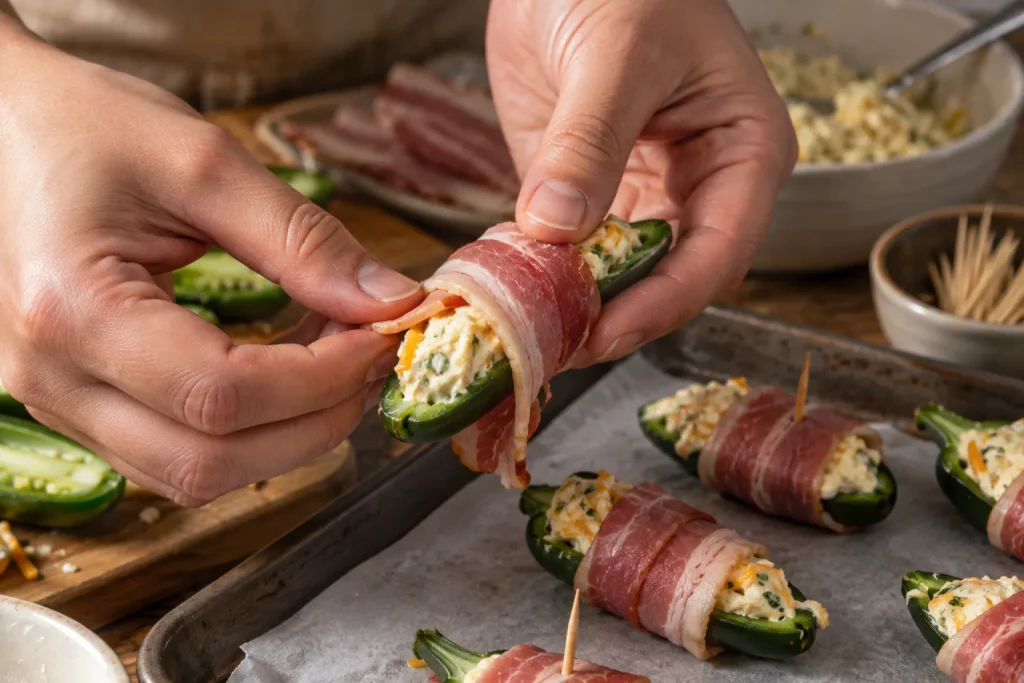
Pipe or spoon the filling into each half, mounding it slightly above the rim. Underfilled peppers shrink as they bake and leave a gap the bacon can’t fully cover.
A piping bag gives the cleanest fill, but a plain zip-top sandwich bag with one corner snipped off works exactly the same way and costs nothing extra.
Step 4. Wrap and Secure
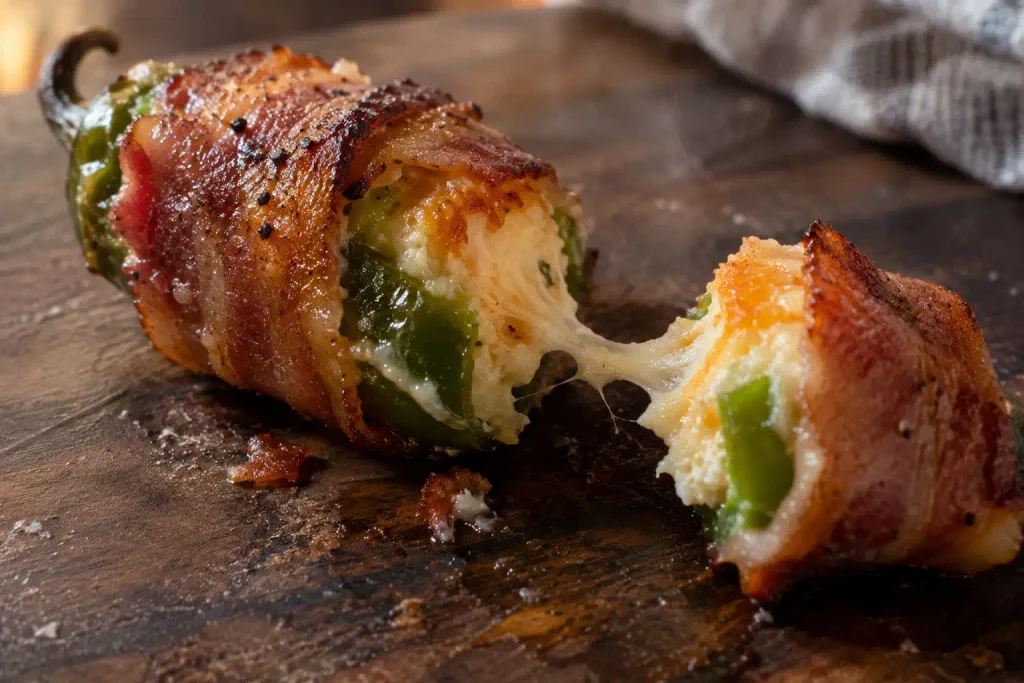
Wrap a half strip of beef bacon around each pepper on a diagonal, overlapping the ends over the exposed cheese, then pin it through both ends and into the pepper flesh with a soaked toothpick. Full coverage isn’t necessary, since the filling firms before it has much chance to run.
Step 5. Bake at Low Heat First
Fifteen minutes at 375°F (190°C) is the low stage: arrange the jalapeno poppers cut side up and let the oven do the rest. The bacon should look pale gold and slightly shrunk, not browned, and the filling should look matte rather than glossy.
Chef’s Note: If the filling still looks wet after 15 minutes, give it 3 to 4 more before broiling. Broiling wet filling just scorches the top without finishing the inside.
Step 6. Broil to Crisp
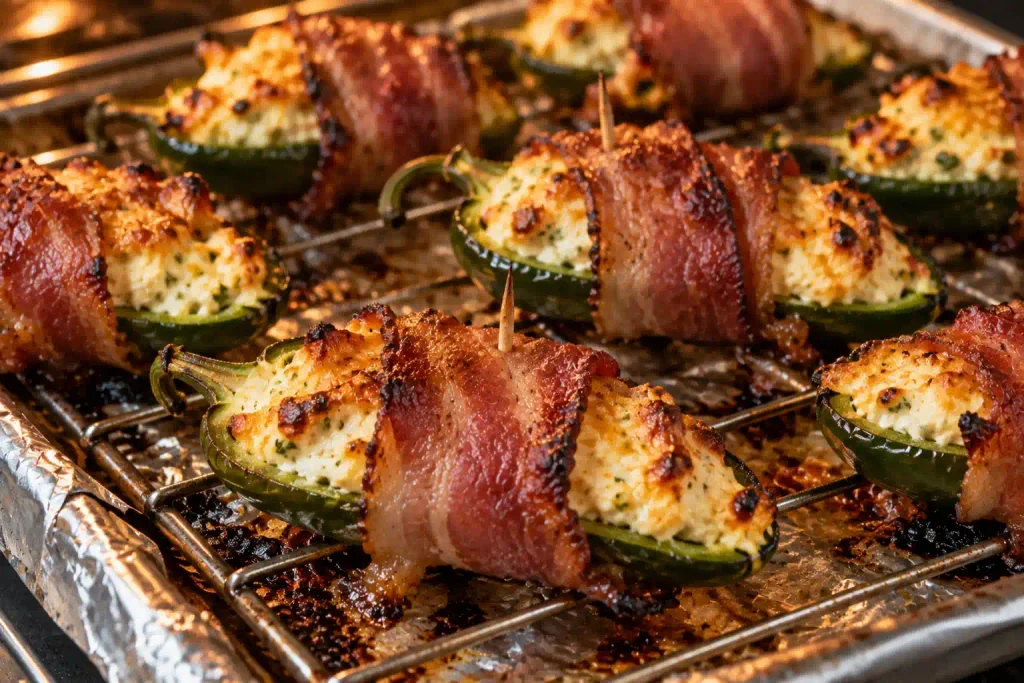
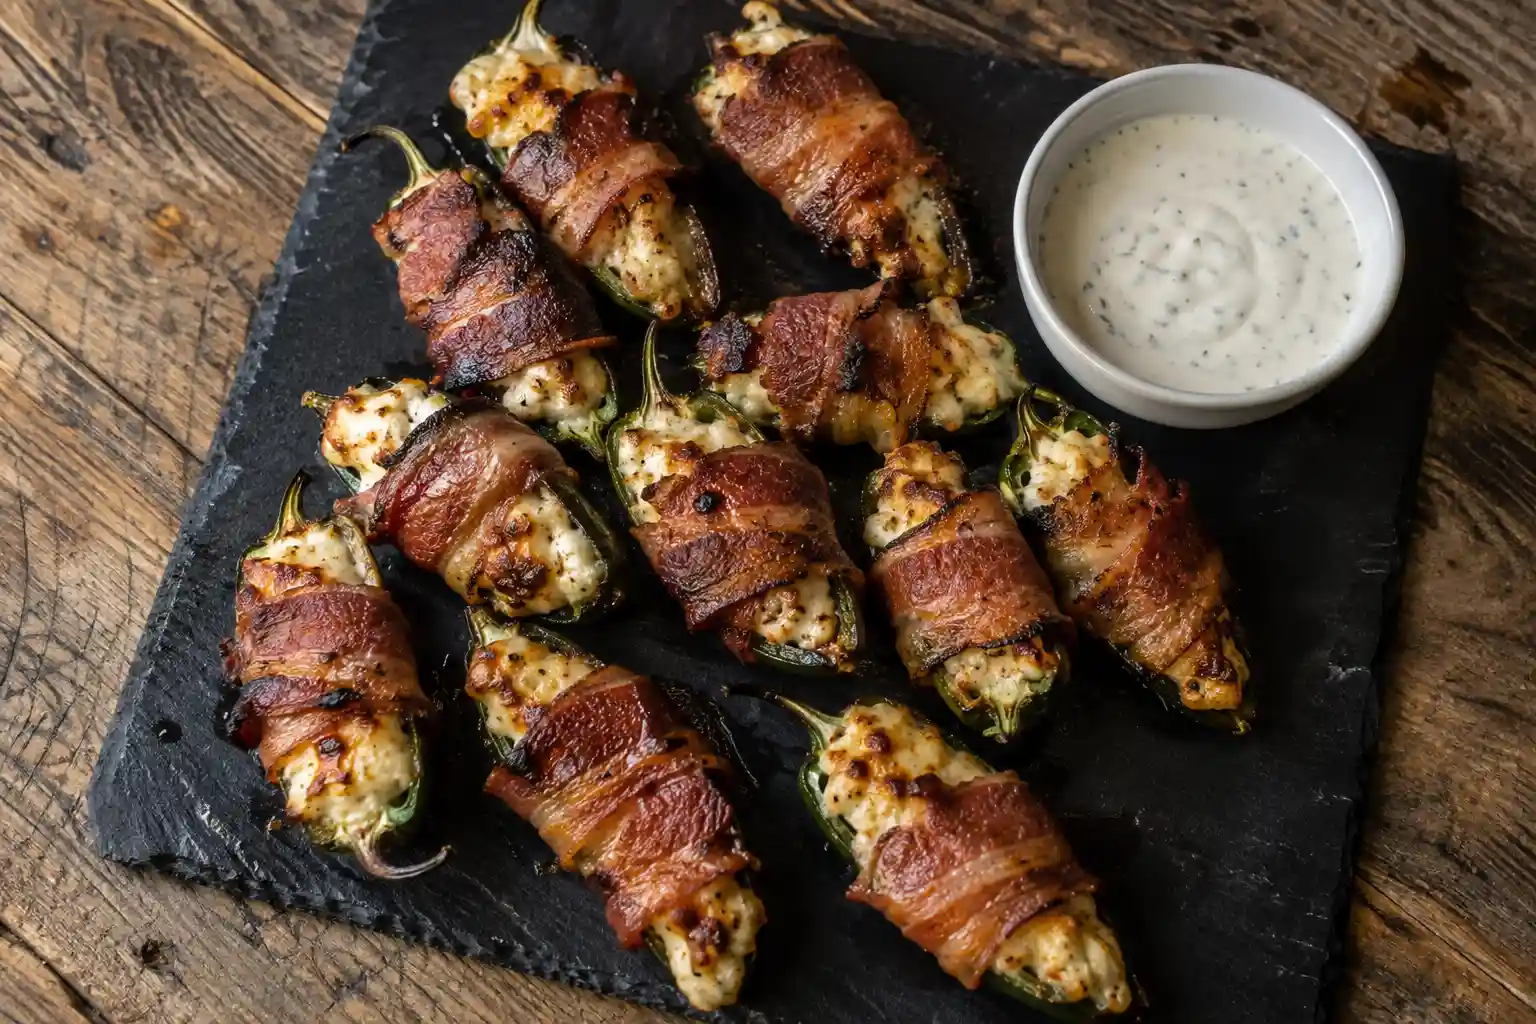
Switch to broil on high and move the tray to the upper third of the oven. Broil 2 to 3 minutes, watching the whole time, until the bacon edges turn deep brown and curl slightly.
Chef’s Note: The gap between crisp and burnt here is closer to 30 seconds than a full minute. Stand at the oven door instead of walking away.
Step 7. Rest Before Serving
The filling comes out of the broiler closer to lava than cheese, so give the jalapeno poppers 5 minutes before anyone touches them. That short rest lets everything firm back up for the first bite.
Expert Tips and Tricks
Don’t skip the rack. Poppers baked flat on a sheet pan sit in their own fat and steam instead of crisping, the biggest reason a home batch turns out soggy.
Assemble the night before. Stuff and wrap the peppers, cover tightly, and refrigerate. Bake straight from the fridge, adding about 3 minutes for the cold start.
Freeze the assembled jalapeno poppers, not the baked ones. Reheated poppers lose most of their crunch, but ones frozen raw and baked straight from frozen, with 5 to 7 extra minutes, come out close to fresh.
Toothpick placement matters more than it looks. Push it through both ends of the bacon and into the pepper flesh, or the strip unwinds as it shrinks.
Room temperature filling pipes cleaner than cold. Cold cream cheese tears the bag and leaves air pockets that collapse into flat spots in the oven.
Seed the whole batch before filling any of it. Batching that one task instead of switching back and forth saves real time over twelve peppers.
Common Mistakes and Troubleshooting
Most jalapeno poppers fail for one of five reasons, all visible before the tray leaves the oven.
| Problem | Cause | Solution |
| Filling boils out the sides during baking | Peppers went in before the filling firmed up, or the bacon wrap left too much cut side exposed | Chill stuffed peppers 15 minutes before wrapping, and overlap the bacon enough to hold the filling as it softens |
| Bacon stays pale and chewy after broiling | Oven runs cooler than the dial shows, or the tray sat too far from the element | Move the tray to the upper third of the oven and broil another minute, checking every 20 seconds |
| Jalapenos taste bitter or unexpectedly hot | Ribs were left in with the seeds, or that batch of peppers was unusually hot | Scrape the ribs out completely, and taste one raw sliver before deciding how many to leave unseeded |
| Peppers turn mushy instead of holding a bite | Overbaked in the low-heat stage, past the point the filling had set | Pull the tray at 15 minutes even if the bacon looks pale; the broil stage finishes the color |
| Cheese looks oily and separated on top | Not enough parmesan to firm the mixture, or the broiler ran too long | Add a full quarter cup of parmesan next time, and pull the tray the moment the edges brown |
The most common failure happens fast and quiet: the filling starts glossy, then a bead of it pushes past the bacon edge around the twelve minute mark and drips onto the rack before you’ve opened the oven door to check. By the time you catch it, that pepper has lost a third of its filling and the bacon around the gap dries out instead of crisping. Chilling the stuffed peppers before they ever meet bacon or heat is what stops it, since firm filling holds its shape long enough for the wrap to do its job.
How to Store Jalapeno Poppers
These don’t hold at room temperature past the two hour mark most food safety guidance allows for dairy and meat together, so skip straight to the fridge or freezer.
Refrigerator
Cooled jalapeno poppers keep in an airtight container up to 4 days. Separate layers with parchment, since the bacon sticks to itself more than you’d expect.
Freezer
Assembled but unbaked jalapeno poppers freeze best. Freeze solid on the rack, about 2 hours, then bag and store up to 2 months. Baked poppers freeze too, though the bacon loses most of its crunch.
Reheating
Reheat in a 375°F (190°C) oven for 8 to 10 minutes, straight from the fridge, until warm through and re-crisped. The microwave works in a pinch but turns the bacon rubbery.
Make Ahead
Stuff and wrap up to 24 hours ahead, cover tightly, and refrigerate. Bake straight from cold, adding about 3 minutes to the first stage.
Variations and Substitutions
Spicier: Leave the ribs in on half the batch and add a pinch of cayenne. Taste the filling before committing the whole bowl.
Mild or kid friendly: Seed and de-rib thoroughly, then soak the hollowed peppers in ice water 10 minutes. It pulls more heat out, though the pepper softens slightly and loses some crispness.
Vegetarian: Skip the bacon and bake uncovered at 400°F (204°C) for 18 to 20 minutes. The filling browns rather than crisps, a different texture, not a lesser one.
Gluten free: If you press a breadcrumb topping into the filling, gluten free panko browns less evenly in the short broil window, so give it an extra 30 seconds.
Other swaps: Pepper jack shifts heat into the cheese itself. Half cottage cheese, half cream cheese lightens the filling, though the texture turns grainy.
Serving Suggestions
Ranch or a cool cilantro lime crema cuts through the richness of the cheese and bacon, and the cold dip against the hot pepper is half the appeal.
A slaw with a vinegar-forward dressing works better as a side than another dip, since the acid resets your palate instead of piling more fat on fat.
For a full spread, set the jalapeno poppers next to buffalo chicken dip and raw vegetables, giving the table one rich, hot option and something cold and crunchy.
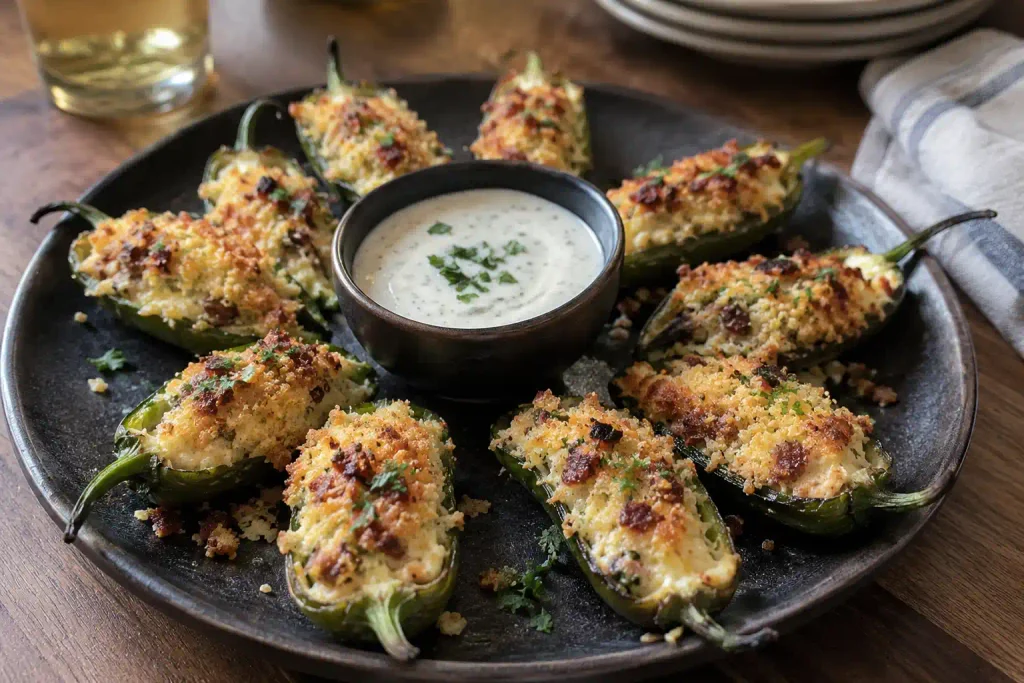
Iced tea or a sparkling limeade holds up better than a heavy drink against this much fat and salt.
Frequently Asked Questions
Can you make jalapeno poppers ahead of time?
Stuffed and wrapped peppers hold in the fridge, covered, for up to 24 hours before baking, which makes this jalapeno poppers recipe workable for a party where the oven is busy until the last minute. Bake straight from cold and add roughly 3 minutes to the first low-heat stage to account for the chill. Fully baked poppers reheat fine too, though the bacon won’t recrisp quite as well as a fresh bake.
Why do my jalapeno poppers turn out watery?
Watery filling usually traces back to peppers that weren’t dried after seeding, or a filling mixed while the cream cheese was still cold and unevenly blended. Moisture trapped inside the pepper boat has nowhere to go once the bacon seals the top, so it collects and thins the cheese as it bakes. Pat the seeded halves dry with a paper towel before filling, and make sure the cream cheese is fully softened before adding anything else to the bowl.
Can I make jalapeno poppers without bacon?
Skipping the bacon means switching the cook method, since bacon fat is what crisps the outside in this version. Bake the stuffed peppers uncovered at 400°F (204°C) for 18 to 20 minutes instead, and expect a softer, more evenly browned top rather than a crisp wrapped edge. A sprinkle of extra cheddar over the exposed filling in the last 5 minutes gives you something closer to a crust in place of the bacon.
How do you know when jalapeno poppers are done?
The filling should look matte rather than glossy on top, and the bacon should show deep brown color with slightly curled edges instead of pale and flat. Internal filling temperature runs around 165°F (74°C) at that point, though texture is the more reliable check here, since the peppers themselves are thin enough to heat through well before the bacon finishes crisping. If the bacon is dark but the filling still looks wet, give it a few more minutes at the lower temperature before returning to the broiler.
Do jalapeno poppers actually need gloves when you’re cutting the peppers?
Bare hands work fine for one or two peppers, but a full batch of twelve leaves enough capsaicin on your skin to sting for hours, especially if you touch your face without realizing it. Dish gloves or a plastic bag over your hand does the job just as well as actual food-prep gloves. Skip gloves and wash your hands with soap instead of just water, since the oil doesn’t rinse off with water alone.
Conclusion
Fifteen minutes at 375°F (190°C) and then a short stretch under the broiler is the part that actually matters here, more than the exact cheese ratio or which bacon you use. Get that sequence right and the filling sets before the wrap even starts crisping, which is the whole difference between a popper that holds together on a plate and one that’s already collapsed by the time it cools. I’ve rushed the broil to save five minutes before and ended up with bacon that looked done on one side and pale on the other, so stand at the oven door for those last few minutes instead of setting a timer and walking off. This jalapeno poppers recipe rewards that bit of attention more than most appetizers do. Pin it now so it’s easy to find the next time someone asks you to bring something to the game.
Jalapeno Poppers
Ingredients
Method
- Halve and seed the jalapenos.
- Mix cream cheese, cheddar, parmesan, green onion, garlic powder, smoked paprika, and salt.
- Pipe filling into the pepper halves.
- Wrap each with half a bacon strip and secure with a toothpick.
- Bake at 375°F (190°C) for 15 minutes.
- Broil 2 to 3 minutes until the bacon is crisp.
- Rest 5 minutes before serving.