Stuffed Bell Peppers Recipe: Foolproof and Ready in 50 Minutes
The first stuffed bell peppers I made came out of the oven sitting in a half inch of their own water, the filling gone thin and the bottoms soggy. The problem wasn’t the filling. It was the peppers, cut open and stuffed raw, releasing moisture straight into the rice as they cooked. Roasting the hollowed shells cut side down for 15 minutes before anything goes inside drains that water out ahead of time, and it’s the one change that fixed every batch after.
Most stuffed pepper recipes treat the shell and the filling as one job: stuff raw peppers, bake for an hour, hope the timing lines up. It rarely does. Peppers finish at different rates depending on wall thickness, and by the time the centers turn tender the filling has usually dried out under foil or gone soupy from trapped steam. This version splits the two jobs apart, so the shells get a head start while the filling gets built wet enough to survive a covered bake.
Why You’ll Love This Stuffed Bell Peppers Recipe
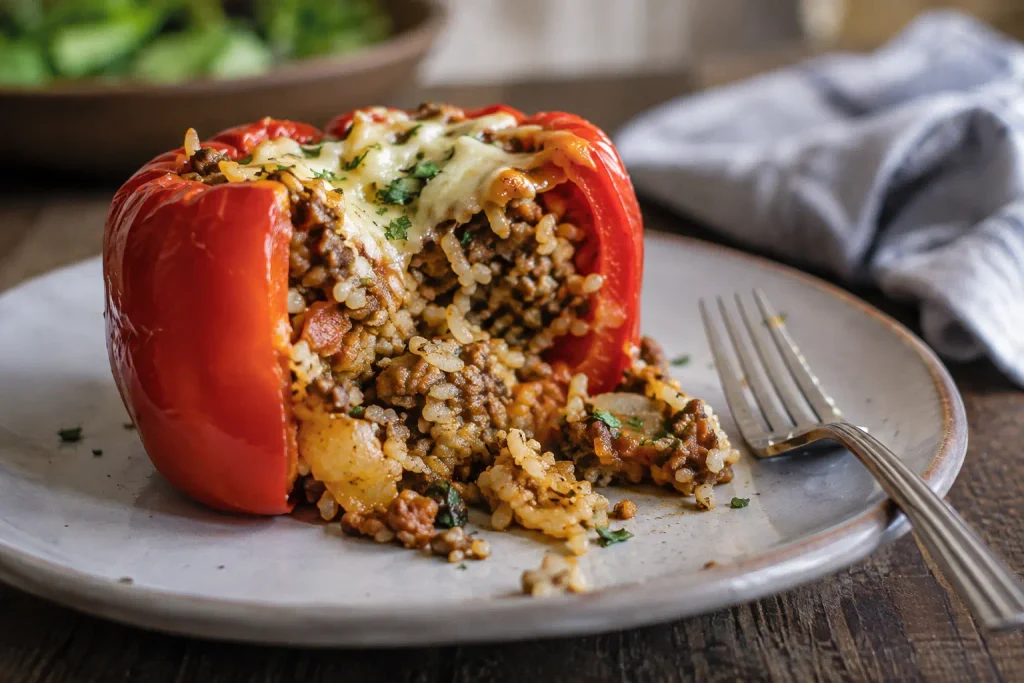
- Holds together when cut into. Rice binds with the beef fat and tomato sauce, so the filling stays on the fork instead of spilling out.
- The peppers actually get tender. Roasting the shells first means the flesh has started to soften before the filling adds 30 more minutes of covered heat.
- One pan, one dish, done. Beef, onion, and garlic brown in the same skillet, so cleanup is a sheet pan plus a baking dish.
- Freezes well before or after baking. Assemble, skip the final bake, freeze them stuffed, then go from freezer to oven with about 20 extra minutes.
- Scales without math. One pepper per person, and the filling measures in whole cups.
- Leftover rice works better than fresh. A day old, it’s dried slightly, so it soaks up sauce instead of turning the filling mushy.
Quick Stuffed Bell Peppers Snapshot
- Prep time: 20 minutes
- Cook time: 50 minutes
- Total time: 70 minutes
- Servings: 6
- Difficulty: Medium
- Calories: 320 per serving
- Decides the outcome: the 15 minute pre-roast on the hollowed shells
- Best for: a weeknight dinner that reheats well for lunch
Stuffed Bell Peppers Nutrition Information
| Nutrient | Amount Per Serving |
| Serving Size | 1 stuffed pepper (about 320 g) |
| Servings Per Recipe | 6 |
| Calories | 320 |
| Protein | 22 g |
| Carbohydrates | 24 g |
| Fat | 16 g |
| Fiber | 3 g |
| Sugar | 7 g |
| Sodium | 540 mg |
Most of the protein in a serving of stuffed bell peppers comes from the beef, with rice adding a smaller share alongside its carbs. Fat follows the beef blend, since 85/15 runs richer than 93/7 but keeps the filling moist. Sodium climbs from the tomatoes and cheese, so a no salt added can brings that number down.
Estimates only, and they’ll shift with the brand of beef and any substitutions you make.
Ingredients for Stuffed Bell Peppers
For the Peppers
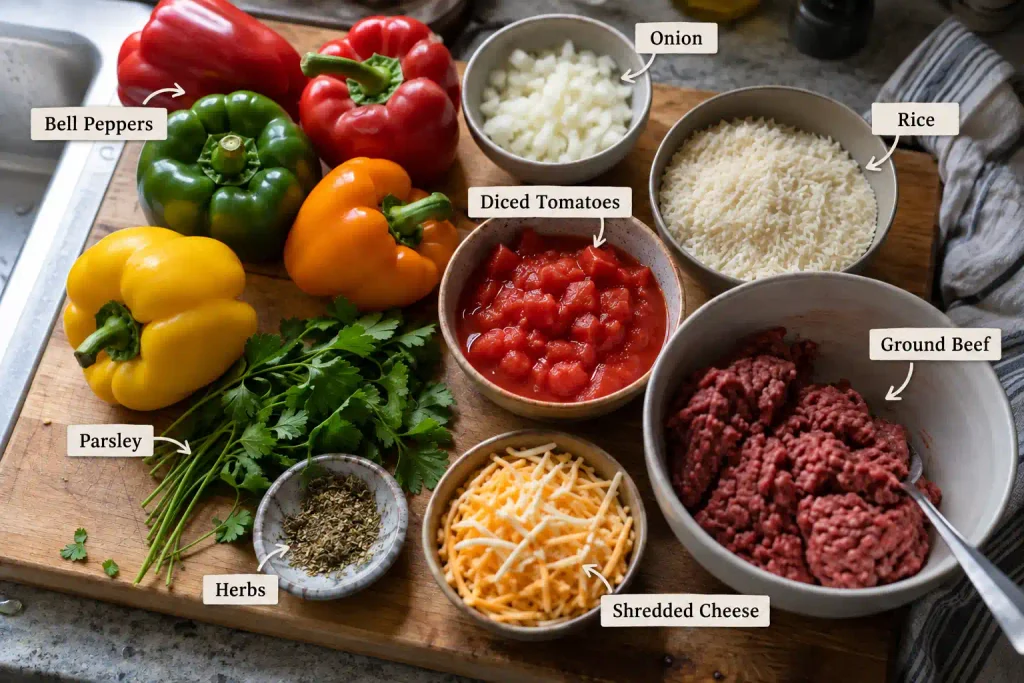
- 6 large bell peppers, any color (red and yellow hold their shape slightly better than green under heat)
- 2 tbsp (30 ml) olive oil
For the Filling
- 1 lb (450 g) ground beef, 85/15, keeps the filling moist under foil
- 1 small yellow onion, diced (about 1 cup / 150 g)
- 3 cloves garlic, minced
- 1 cup (185 g) cooked white rice, a day old if you have it
- 1 can (14.5 oz / 411 g) diced tomatoes, drained
- 1 cup (240 ml) tomato sauce, divided
- 1 tsp dried oregano
- 1 tsp dried basil
- 1/2 tsp smoked paprika
- 1 tsp Worcestershire sauce, optional (contains anchovy, see allergen note below)
- Salt and black pepper, to taste
- 1.5 cups (170 g) shredded mozzarella or cheddar, divided
- 1/4 cup (60 ml) beef broth
- Fresh parsley, chopped, for serving
Out of diced tomatoes? Crushed works, just drain longer. No smoked paprika? Regular paprika with a pinch of cumin gets close.
Allergen and Dietary Disclosure
As written, this recipe contains milk from the cheese, and if you use the Worcestershire, fish, since most bottled versions include anchovy. It’s gluten free if the Worcestershire and broth are labeled gluten free, and halal with halal certified beef and broth. It’s nut free and egg free as written. For dairy free, skip the cheese or use a dairy free shred; the peppers still hold together, though the top won’t brown the same way. Worcestershire is the hidden risk, easy to miss on a label, so skip it if fish allergies matter.
Equipment for Stuffed Bell Peppers
- Large rimmed baking sheet. The shells roast here first, cut side down, so steam escapes instead of collecting inside.
- 9×13 inch baking dish. Deep enough to hold six peppers upright with broth pooling underneath, not over the rims.
- Large skillet. Cast iron holds heat well here; this batch was tested in a Lodge skillet, and the filling browns in stages, beef first, then onion and garlic in the fat left behind.
- Instant read thermometer. Beef needs to clear 160°F (71°C), and a thermometer is the only reliable check.
- Sharp paring knife. For coring the peppers without tearing the walls, since a torn wall is where filling leaks out.
Buy peppers by weight if the store allows it. Two peppers of the same width can differ by 50 grams, and thicker walls need extra oven time.
Prep Before You Start
Cook the rice ahead, cooled fully, ideally a day before, so it doesn’t turn the filling gummy. Slice the tops off the peppers a half inch down, then pull out the seeds and ribs. Stand each pepper up; if one rocks, shave a thin sliver off the bottom, just enough to level it. Dice the onion and mince the garlic before the beef goes in the pan, since the filling comes together fast. Get the oven to 400°F (200°C) before anything else, since stuffed bell peppers need full heat right away to roast rather than steam.
Step by Step Directions for Stuffed Bell Peppers
Step 1. Roast the shells hollow side down
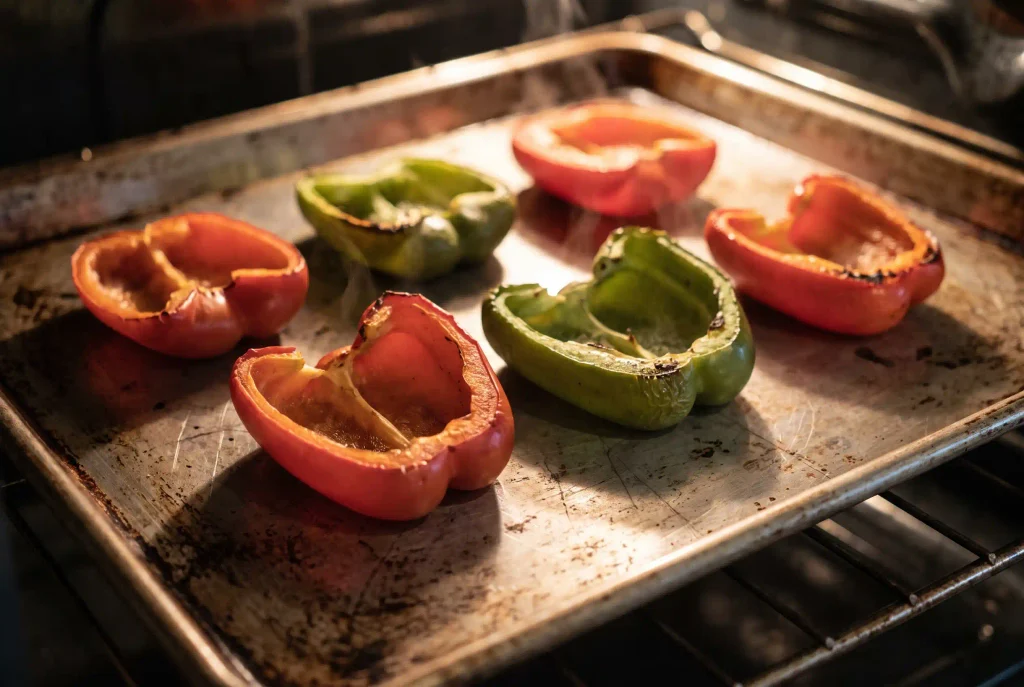
Rub each cored pepper with oil, cut side down on the sheet, hollow side against the pan. Roast at 400°F (200°C) for 15 minutes, the step that keeps stuffed peppers from sitting in their own water later. Face down, the moisture drains onto the pan instead of pooling in the cavity.
A pepper that won’t stand flat after roasting isn’t a problem. It’s hollow side down anyway, so a wobble now won’t matter once it’s stuffed in the dish.
Step 2. Brown the beef
Heat the skillet over medium high and add the beef in an even layer, left alone three minutes before breaking apart so the bottom browns instead of graying. Chef’s Note: Once no pink remains and the center reads 160°F (71°C), drain off all but a tablespoon of the rendered fat, or it pools at the bottom of the pepper.
Step 3. Soften the onion and garlic
Cook the onion in the reserved fat about 5 minutes, until soft with color at the edges, then add garlic for the last 30 seconds. Burnt garlic turns the filling bitter fast in a pan this hot.
Step 4. Build the filling
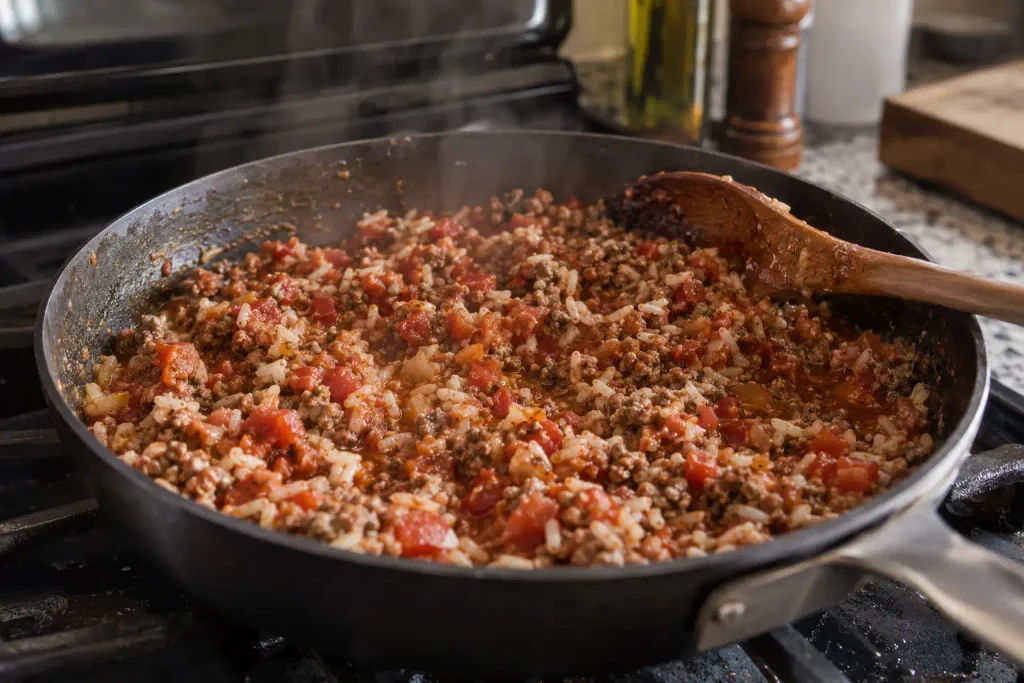
Stir in the rice, drained tomatoes, half the tomato sauce, oregano, basil, paprika, and Worcestershire, if using. Taste it now, before it’s inside a pepper. The mix should look wetter than a finished filling; it tightens up in the oven.
Step 5. Fill the peppers
Flip the shells upright in the dish and pour the broth into the bottom, not the peppers. Spoon in the filling, pressing gently to avoid air pockets, and mound it above the rim.
Step 6. Cover and bake
Spoon the remaining sauce over the tops, cover tightly with foil, and bake at 375°F (190°C) for 30 minutes. Chef’s Note: Uncovered, the tops dry out and split before the peppers underneath soften.
Step 7. Add cheese and finish uncovered
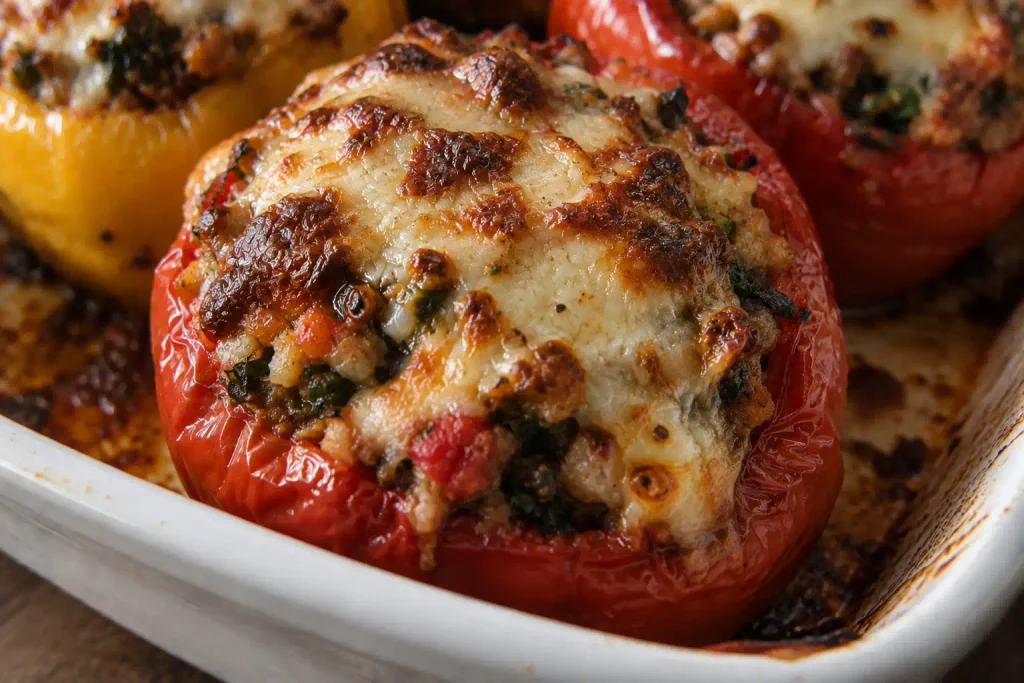
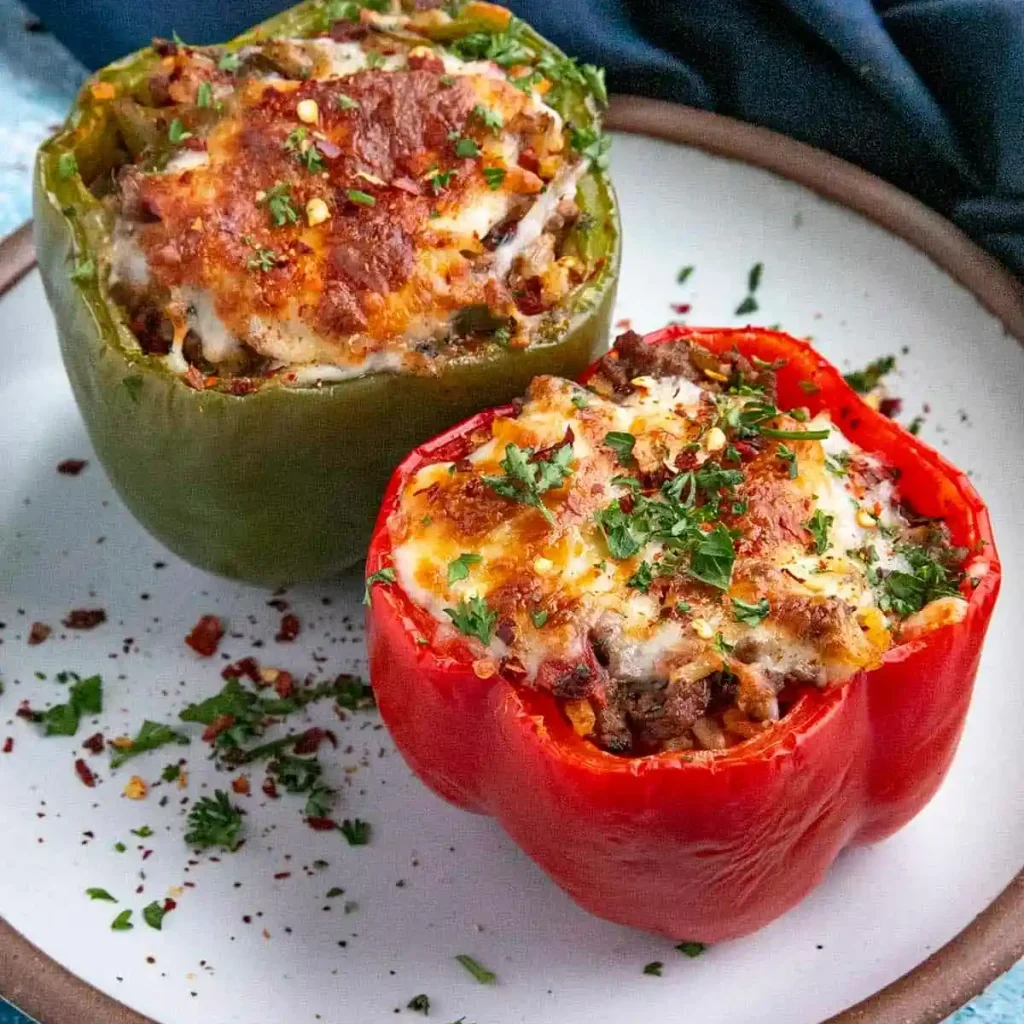
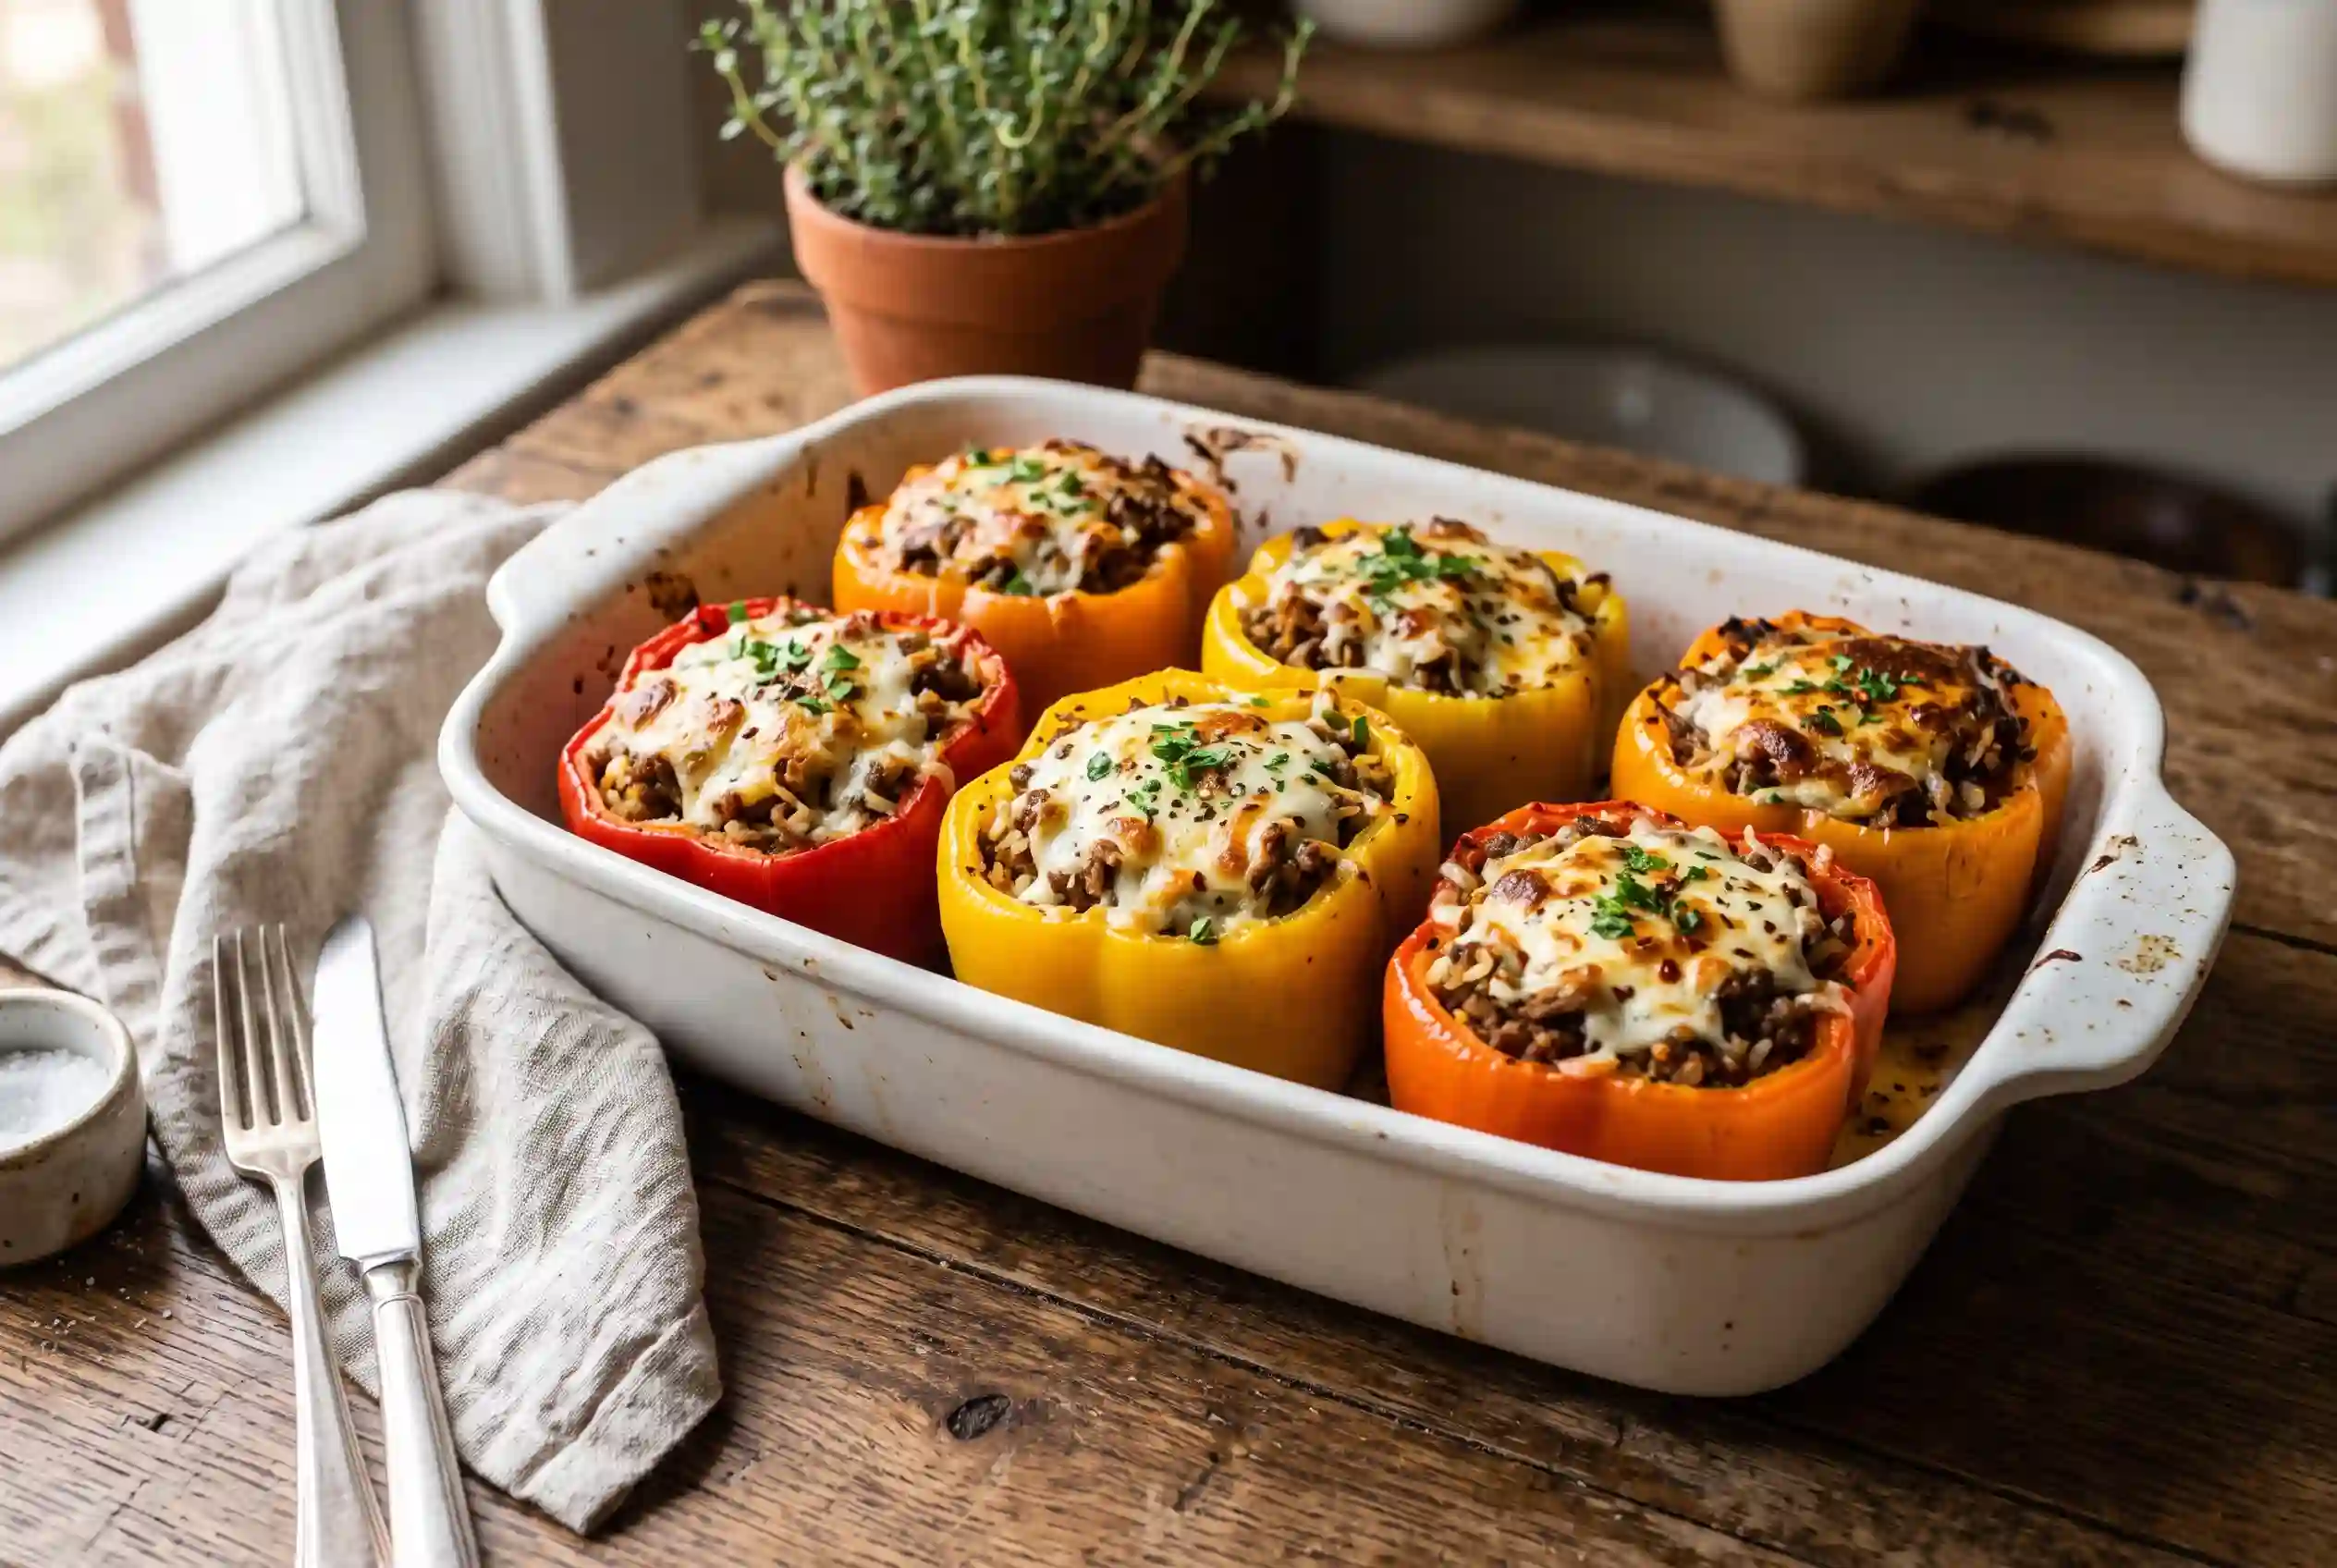
Remove the foil, scatter cheese over each pepper, and bake uncovered 10 to 12 minutes, until melted and just gold at the highest points, with a knife sliding into the thickest wall with almost no resistance.
Step 8. Rest before serving
Let the dish sit 5 to 10 minutes before cutting in. Chef’s Note: Cut too soon and the filling spills out the side, since it’s still loose from the heat; the rest lets it firm up. Scatter the parsley over the top just before serving.
Expert Tips for Perfect Stuffed Bell Peppers
A few things that make a real difference with stuffed bell peppers.
Stuffing raw peppers is the most common mistake. Skipping the pre-roast is the biggest reason stuffed peppers swim in liquid, and it only costs 15 minutes, mostly while the beef browns.
Assemble the dish a day ahead to get ahead of dinner. Stuff, cover, refrigerate unbaked, then add 5 to 10 minutes to the covered bake for the cold start.
Day old rice beats fresh. It holds its shape through the second cook, where same day rice is still wet and pushes the filling toward porridge.
Don’t go lean on the beef. An 85/15 blend bastes the filling as it bakes; 93/7 dries out under the foil.
Freeze the peppers before baking, not after. Already baked peppers turn mushy once thawed. Raw and frozen, they bake up nearly as good as fresh.
The broth in the dish earns its place. It keeps dry heat from pulling moisture out of the walls, and turns into a thin sauce worth spooning over the top.
Common Mistakes and Troubleshooting
| Problem | Cause | Solution |
| Peppers sitting in liquid at the bottom | Shells released moisture into the filling during the bake, not before | Roast hollow side down 15 minutes first, then spoon off any leftover liquid |
| Filling dry and crumbly on top | Baked uncovered too long, or too little sauce went in before stuffing | Cover with foil the first 30 minutes and add extra sauce before the cheese |
| Pepper walls still firm after the full bake | Wall thickness varies, and thick walls need extra time | Test with a knife at the widest point, not the stem, and add 10 minutes covered |
| Filling spills out when cut into | Not enough rest time, or too much rice against the beef | Rest 5 to 10 minutes before cutting, and use less rice next time |
| Cheese burnt before the peppers finished | Cheese went on too early, or the oven runs hot | Add cheese only in the final 10 to 12 minutes |
The watery bottom is the failure almost everyone hits first, since a raw pepper is still full of water when it meets a hot oven. That water has nowhere to go but into the filling, and by the time the peppers are tender, the rice has absorbed liquid it was never meant to hold. The fix isn’t a thicker filling. It’s giving the pepper a head start to drain that water on its own, face down, before anything touches it.
Storage Instructions for Stuffed Bell Peppers
Baked stuffed bell peppers have beef and cheese in the filling, so skip room temperature storage. Get leftovers into the fridge within two hours.
Refrigerator
Keeps in a sealed container up to 4 days. Peppers soften by day two, which some people prefer since the walls cut easier.
Freezer
Wrap each cooled, baked pepper in foil, group in a freezer bag, for up to 3 months. For unbaked peppers, skip the wrap, freeze in the covered dish, and bake from frozen with 20 extra minutes.
Reheating
Reheat covered at 350°F (175°C) about 20 minutes from the fridge, or 40 from frozen. The microwave works too, about 3 minutes, though the walls soften.
Make Ahead
Assemble up to a day before baking, cover, and refrigerate, adding 5 to 10 minutes to the covered bake for the cold start.
Stuffed Bell Peppers Variations and Substitutions
- Spicy: Add a diced jalapeño with the onion, and swap the paprika for a scant teaspoon of cayenne, so the heat builds slowly instead of hitting all at once.
- Mild or kid friendly: Skip the paprika and stir extra cheese into the filling itself. Reads more like a cheeseburger in a pepper cup.
- Vegetarian: Swap the beef for a 15 oz can of drained black beans plus extra rice, and skip the Worcestershire too.
- Gluten free: Already close. Just confirm the broth and any Worcestershire are labeled gluten free.
- Different grain: Quinoa swaps in cup for cup, though it packs looser. Riced cauliflower works for a rice free version, but releases more water, so cut the broth in half.
- Ground turkey instead of beef: Leaner, so add an extra tablespoon of oil with the meat to keep it from drying out under the foil.
What to Serve with Stuffed Bell Peppers
A few pairings that work well alongside stuffed bell peppers:
- A green salad with a sharp vinaigrette cuts through the cheese and beef.
- Garlic bread mops up the tomato sauce, since the peppers don’t come with enough.
- Plain yogurt or sour cream cools down the spicy variation without masking the paprika.
- Roasted green beans round out the plate without competing with the pepper’s sweetness.
- Cornbread plays its sweetness against the savory filling.
Frequently Asked Questions About Stuffed Bell Peppers
Can I make stuffed bell peppers a day ahead?
Assembling the peppers the day before works well and actually improves the beef and rice filling once it’s had time to sit. Cover the stuffed peppers, unbaked, and refrigerate for up to 24 hours. Pull the dish out about 20 minutes before it goes in the oven so it isn’t starting from completely cold, and add 5 to 10 minutes to the covered portion of the bake to make up for the lower starting temperature.
Why did my stuffed bell peppers turn out watery?
Raw pepper shells hold a surprising amount of water, and a long bake pulls that water straight into the filling if the peppers go in unroasted. Roasting the hollowed shells cut side down for 15 minutes before stuffing lets that liquid drain onto the sheet pan instead of pooling in the dish later. If it still happens, tilt the baking dish and spoon off the excess before serving, and cut back the tomato sauce slightly next time.
Can I use quinoa instead of rice?
Cooked quinoa swaps in fine for rice, cup for cup, though the texture shifts a little. Quinoa holds together looser than rice, so the filling won’t pack as firm and might spill more when you cut into it fresh from the oven. It adds noticeably more protein, which is usually the trade people are after. Let the peppers rest the full 10 minutes before serving to help the looser filling set.
How do I know when stuffed bell peppers are fully cooked?
Two things need to check out. The beef filling should read 160°F (71°C) on an instant read thermometer, and a paring knife should slide into the thickest part of the pepper wall with almost no resistance. Wall thickness varies even within the same bag of peppers, so start checking at the 45 minute mark rather than trusting the clock alone.
Do stuffed peppers actually need to be roasted or boiled first?
Skipping that step is the most common shortcut people take, and it’s also the reason so many stuffed peppers end up sitting in liquid. Boiling works but waters down the pepper’s flavor along with the moisture. Roasting the hollowed shells cut side down for 15 minutes does the same drainage job without diluting anything, on the same sheet pan you’re already using while the oven heats.
Fifteen minutes feels like a long time to spend on something you’re about to cook again anyway, and that’s usually why people skip the pre-roast once and not twice. Pull a dish out of the oven with a puddle under the peppers and roasting the shells stops feeling optional. Everything else in this stuffed bell peppers recipe is forgiving: swap the meat, change the cheese, add heat if you want it. The shells are the one part that decides whether dinner holds together on the plate or falls apart the second you cut into it. Pin this one before you close the tab, since the fifteen minute step is easy to forget by next week.
Classic Stuffed Bell Peppers
Ingredients
Method
- Roast the cored, hollowed peppers cut side down at 400°F (200°C) for 15 minutes.
- Brown the ground beef in a skillet, drain the fat, and check for 160°F (71°C).
- Cook the onion in the same skillet for 5 minutes, then add garlic for 30 seconds.
- Stir in rice, tomatoes, half the tomato sauce, and seasonings. Taste and adjust.
- Flip the peppers upright in the baking dish and pour the broth in the bottom.
- Fill each pepper, pressing down and mounding slightly above the rim.
- Top with remaining tomato sauce, cover, and bake at 375°F (190°C) for 30 minutes.
- Uncover, add cheese, and bake 10 to 12 minutes more until melted and browned.
- Rest 5 to 10 minutes before serving with parsley on top.
One Comment
Comments are closed.