Chicken and Rice: Easy Crispy Skin Skillet in 65 Minutes
Skin is the weak point of most chicken and rice. Tuck thighs under a lid with the rice and the skin steams until it turns pale and rubbery, then slides off in one sheet on the first bite.
This version starts with the skin. The thighs go into a cold skillet skin side down, and over about 12 minutes the fat renders out. Rendering just means melting fat out of the skin. That fat then toasts the rice, and a few minutes under the broiler at the end blisters the skin back to crisp.
This chicken and rice needs one 12-inch oven-safe skillet and no added oil, and most of the 65 minutes is hands off. It feeds four.
Why You’ll Love This Chicken and Rice
- Crisp skin from a covered pan. The broiler finish blisters skin that spent 26 minutes under a lid.
- There is no added oil. Six thighs give up enough fat to toast the rice, so the bottle stays in the cupboard.
- Every grain tastes like roasted chicken, because the rice fries in chicken fat before any broth goes in.
- The 10-minute rest gives you slack. The pan holds its heat, so the rice keeps steaming if guests run late.
- Cleanup is one skillet and a lid. The jar of extra fat is worth saving for roasted potatoes.
Nutrition Snapshot
| Nutrient | Per serving |
| Calories | 560 |
| Protein | 32 g |
| Carbohydrates | 66 g |
| Fat | 18 g |
| Fiber | 1 g |
| Sugar | 2 g |
| Sodium | 700 mg |
These are estimates for 1 of 4 servings of chicken and rice, about 1½ thighs with 1 cup of cooked rice. Only 2 tablespoons of rendered fat go back into the pan. Sodium varies by brand.
Ingredients
Everything for this chicken and rice comes from the regular grocery aisles.
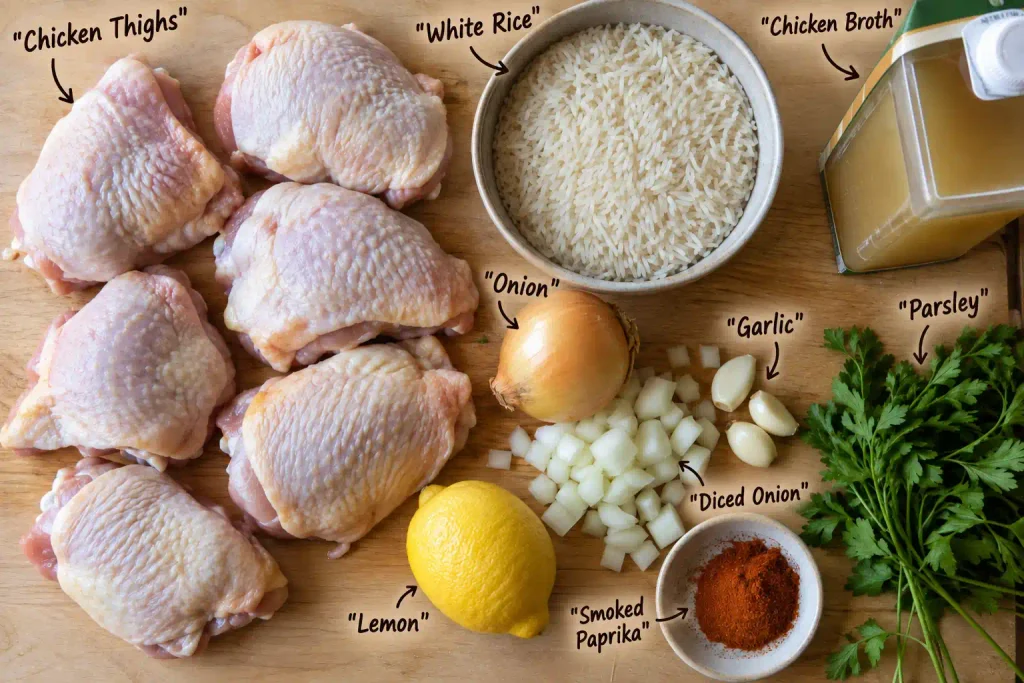
- 6 bone-in, skin-on chicken thighs (about 2 pounds / 900 g): the skin is the source of both the crunch and the fat. Pick thighs of similar size so they finish together.
- 1¾ teaspoons Diamond Crystal kosher salt, divided: use 1 teaspoon total if your salt is Morton kosher, which is denser.
- 1½ teaspoons smoked paprika: colors the skin a deep red.
- ¾ teaspoon black pepper: adds a mild bite to the skin.
- 1 medium yellow onion, diced (about 1 cup): cooks in the saved fat and sweetens the rice.
- 4 garlic cloves, minced: added with the rice so fat and moisture keep it from scorching.
- 1½ cups (300 g) long grain white rice: rinsed so the grains stay separate.
- 2¼ cups (540 ml) low-sodium chicken broth, hot: hot liquid keeps the pan from cooling, so the rice cooks evenly.
- 1 lemon: its juice cuts through the richness at the end.
- 2 tablespoons chopped fresh parsley: for a fresh finish.
Allergen Information
This chicken and rice has no dairy or eggs and no peanuts or tree nuts. Store-bought broth is where hidden allergens usually sit. Some brands add celery or milk ingredients while others use soy or wheat, so read the label before you buy. Gluten needs the same check on the broth label. The dish is gluten-free only when the broth is labeled gluten-free. Check the paprika jar too if you cook for someone with a serious allergy.
Equipment
Any oven-safe 12-inch skillet with a lid handles this chicken and rice.
- 12-inch oven-safe skillet with a tight lid: cast iron or stainless steel. Nonstick coatings are not made for the broiler.
- Instant-read thermometer: the only reliable way to know the thighs reached 175°F.
- Fine-mesh strainer: for rinsing the rice.
- Heatproof glass jar: holds the extra fat once you pour it off.
- Small saucepan or microwave-safe jug: for heating the broth.
- Tongs: for turning and moving hot thighs.
Prep Before You Start
Prep for this chicken and rice takes about 10 minutes.
- Season the thighs. Pat them very dry with paper towels, then season all over with 1 teaspoon of the salt and dust on the paprika and pepper.
- Rinse the rice. Hold it in the strainer under cold running water for about 30 seconds, until the runoff is mostly clear, then shake it dry.
- Chop the onion and mince the garlic.
Pro Tip: Rinsing removes the loose surface starch that turns skillet rice gummy. It costs 30 seconds. No other prep step changes the texture as much.
How to Make Chicken and Rice
Render the Skin
Lay the thighs skin side down in a cold 12-inch skillet with a little space between them. Set the heat to medium and cook without moving them for 12 minutes. The skin is ready when it turns deep golden and lifts from the pan on its own. About 3 tablespoons of clear fat should have pooled around the thighs. Meanwhile, warm the broth until it steams.
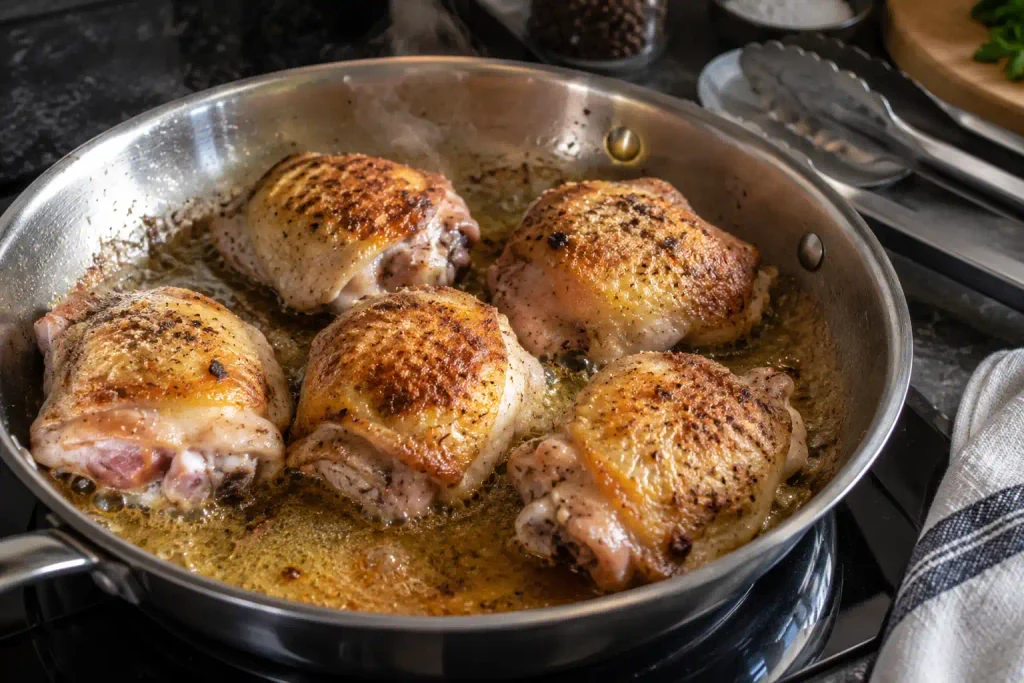
Chef’s Note: Start with a cold pan on purpose. Heat that arrives slowly melts the fat before the skin tightens, which gives you rendered fat instead of scorched skin.
Save the Fat
Move the thighs to a plate, skin side up. Tilt the skillet and pour off all but 2 tablespoons of the rendered fat into the heatproof jar. If the pan comes up short, add a spoonful of neutral oil. Leave the browned bits on the bottom. Cooks call them fond, and they dissolve into the broth later to flavor the rice. This takes about 1 minute.
Toast the Rice
Reduce the heat to medium-low and cook the onion in the saved fat for 4 minutes, stirring, until soft. Stir in the garlic and the rinsed rice. Toast for 2 minutes. Toasting means frying dry grains in fat until the edges turn translucent and smell nutty.
Chef’s Note: Every grain picks up a thin coat of rendered fat here. That coat keeps grains separate. It also gives the rice a savory, roasted flavor that plain broth cannot.
Add Hot Broth
Pour in the hot broth and the remaining ¾ teaspoon of salt. Scrape the fond loose with a wooden spoon. Bring the liquid to a full boil and stir once to level the toasted rice. This takes about 3 minutes.
Nestle the Chicken
Set the thighs skin side up on the rice, pressing them in just enough to sit steady. Keep the skin above the liquid. Cover with the lid and turn the heat to low. Finish this within 2 minutes.
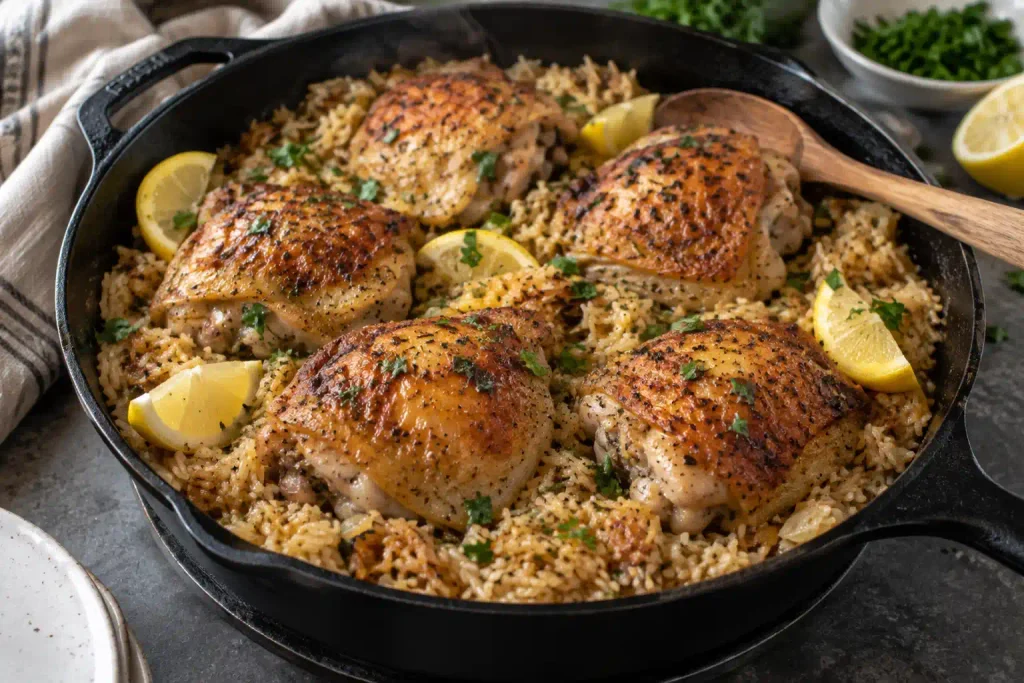
Chef’s Note: Keep the skin out of the liquid. Broth that touches skin softens it, and the broiler then has more to undo.
Simmer Without Peeking
Cook covered on low for 16 minutes without lifting the lid. Each peek lets out the steam that cooks the rice, and condensation from the lid can drip onto the rendered skin.
Rest Off Heat
Turn off the heat and leave the lid on for 10 minutes while the rice finishes in trapped steam. Turn the broiler on high, with a rack 6 inches from the element. Then check the thickest thigh. The thermometer should read at least 175°F (79°C), with the tip clear of the bone.
Chef’s Note: Thighs are safe at the USDA minimum of 165°F, but they turn tender closer to 175°F, when the connective tissue softens. If yours reads lower, cook it covered on low for 5 more minutes, then broil as planned.
Broil the Skin
Take off the lid and broil the skillet for 3 minutes, until the skin is dark golden and blistered. Use oven mitts, because the handle is hot from the stovetop.
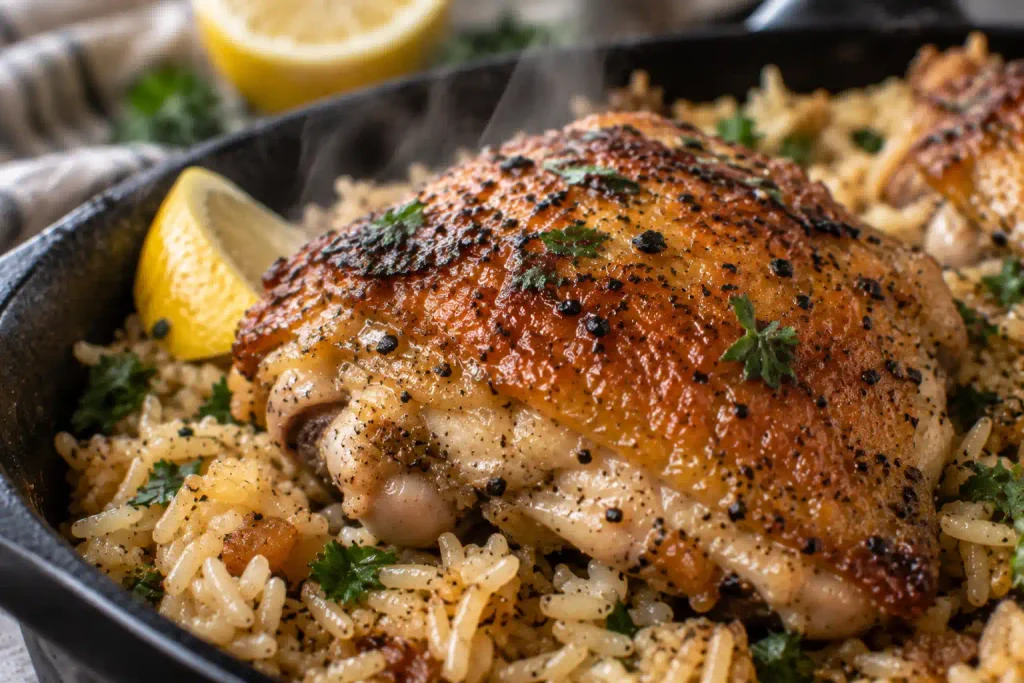
Chef’s Note: Watch the pan the whole time. Skin that rendered well in the first step browns in seconds, and a good render is what lets it crisp so fast.
Fluff and Finish
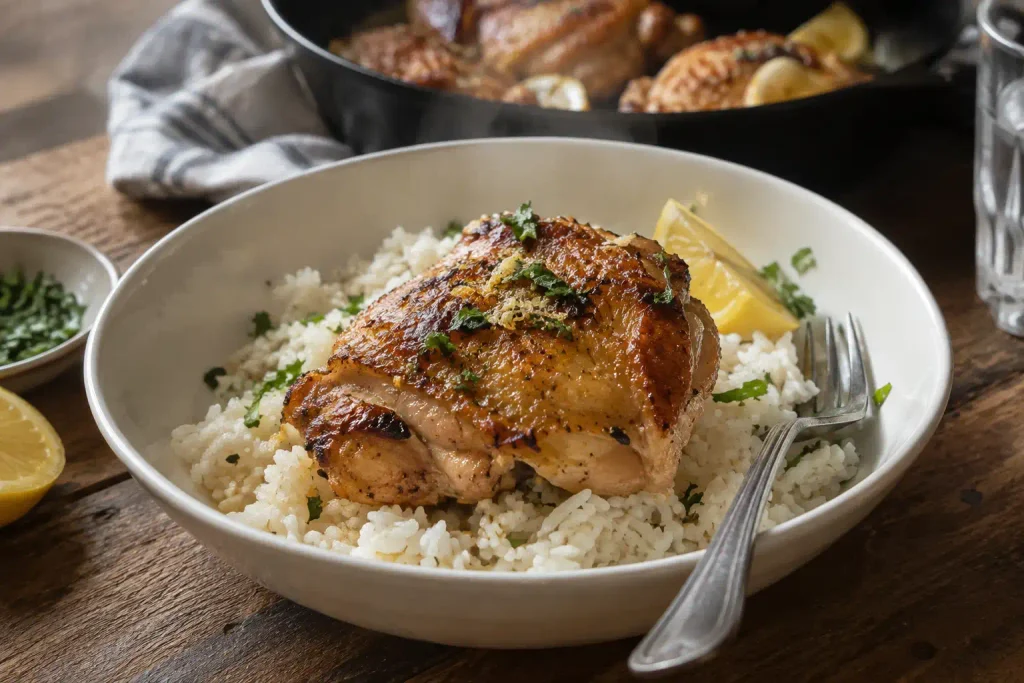
Lift the thighs onto a plate. Squeeze the lemon over the rice and scatter on the parsley. Fluff the rice with a fork, scraping up any golden bits from the bottom, then return the broiled thighs to the top. Serve straight from the skillet, and plan on about 2 minutes for this whole step.
Expert Tips for Crispier Skin
- Salt a day ahead. Season the thighs, then leave them uncovered on a plate in the fridge for up to 24 hours. The dry surface renders faster and browns deeper.
- Tip the lid away. Lift it sideways over the sink so the condensation runs off instead of dripping on the skin.
- Seal the lid. If yours sits loose, press a sheet of foil under it. Escaping steam leaves the rice crunchy.
- Trust color over the clock. Stoves run hot or cool, so judge the render by how golden the skin looks and how easily it releases.
What to Serve on the Side
A cucumber and tomato salad dressed with lemon and a pinch of salt cuts the richness of this chicken and rice well. Steamed green beans work too. Both come together in the time the rice rests, so they never compete with the skillet for stove space.
Save the Fat: The extra fat in the jar keeps in the fridge for up to a week. Roast potatoes in it at 425°F for a side with deeper flavor.
Common Mistakes and Fixes
Most problems with chicken and rice trace back to fat or steam.
| Problem | Cause | Fix |
| Greasy, heavy rice | More than 2 tablespoons of rendered fat stayed in the pan | Tilt the skillet and spoon off pooled fat before fluffing, then measure next time |
| Soft, pale skin | Skin sat under the liquid line, or condensation dripped on it | Broil 1 minute longer and keep the skin above the rice next time |
| Rubbery skin that never browned | The pan started hot or was crowded, so the fat never rendered | Start cold and use only 6 thighs. Wait until the skin releases |
| Crunchy rice in the center | The lid was lifted, or the heat ran high and the broth boiled off | Add ¼ cup hot broth and cook covered on low for 5 minutes |
| Mushy, gluey rice | The rice was not rinsed, or the broth was overmeasured | Rinse until the runoff is mostly clear, then measure the broth exactly |
| Scorched bottom | The heat stayed above low after the boil, so the toasted fat browned too far | Use the smallest burner on its lowest setting |
Storing Leftover Chicken and Rice
Fridge Storage
Spoon the rice and chicken into shallow airtight containers within 1 hour of cooking, so the rice cools fast. Cooked rice left warm on the counter can grow bacteria whose toxins survive reheating. Leftover chicken and rice keeps for up to 4 days.
Freezer Storage
Freeze single portions in flat freezer bags for up to 3 months. Thaw overnight in the fridge before reheating.
Reheating Safely
Reheat until the center reaches 165°F (74°C). Sprinkle 2 tablespoons of water over each portion of rice and microwave it covered for 2 to 3 minutes. To bring back the crisp, set the thigh skin side up on a rack in a 425°F (220°C) oven for 8 to 10 minutes.
Using Leftovers
Pull leftover thigh meat off the bone and fold it into chicken salad. Chilled rice is drier and firmer than fresh rice, so it fries into separate grains for fried rice instead of clumping in the pan.
Chicken and Rice Variations
Spicy Version
Add 1 teaspoon of cayenne to the skin seasoning and cook a sliced jalapeño with the onion. The chile softens in the fat and spreads through the rice.
Mild Version
Use sweet paprika in place of smoked and leave out the black pepper. The skin keeps its color.
Vegetarian Version
Skip the chicken. Brown 12 ounces of sliced mushrooms and one can of drained chickpeas in 3 tablespoons of olive oil for about 8 minutes, then add the onion and continue from the rice step. The oil stands in for the rendered fat, so use vegetable broth and skip the broiler.
Rice Swaps
Basmati works one for one. Jasmine needs only 2 cups of broth and a 14 minute simmer. Brown rice needs about 40 minutes and extra broth, so it fits neither the timeline nor the ratios here.
Frequently Asked Questions
Can I make chicken and rice ahead of time?
Yes, up to the rest. Finish the resting step and leave the lid on, and the skillet stays hot enough to hold for about 20 minutes without the rice going cold. Broil the skin just before serving, so it reaches the table crisp. Past 20 minutes, cool the pan’s contents fast and refrigerate them, as described in the storage section. Never broil first and wait, since steam softens the skin again.
Why does my chicken and rice taste bland?
Under-salted rice is the usual cause. Some of the salt on the skin leaves with the fat, so the broth needs its own. Toast the rice in the rendered fat for the full 2 minutes, so each grain picks up a savory coat before any liquid goes in. Lemon juice at the end sharpens flavor the way salt does. Taste low-sodium broth before you pour it in, because some brands are close to unsalted.
Can I use chicken breasts instead of thighs?
Use bone-in, skin-on breasts, cut in half crosswise so the pieces match thigh size and cook at the same pace. They render less fat, so save every spoonful. Breasts dry out quickly, so check one with a thermometer after 12 minutes of simmering. Pull the pieces at 160°F (71°C) and let them finish resting on a plate, then return them for the broil. Boneless, skinless breasts do not suit this method.
How long do boneless thighs take in one skillet chicken and rice?
Boneless thighs have no skin to render. Sear them in 2 tablespoons of neutral oil for 4 minutes per side and set them aside. Then toast the rice in that pan as usual and return the thighs on top for a covered 12 minute simmer. Rest for 10 minutes and skip the broiler. You lose the crisp finish, which is the main reason to choose bone-in thighs.
Can I add vegetables to chicken and rice?
Yes, with timing in mind. Diced carrots go in with the onion, where the rendered fat softens them during those 4 minutes of cooking. Frozen peas can be stirred in at the start of the rest, where trapped steam warms them through in about 2 minutes, with no extra heat needed. Skip zucchini and fresh tomatoes, which release water and make the rice mushy. Keep the total near 1 cup.
The Skin Is the Point
Render slowly, toast the rice in that fat, and broil at the end. That order is the whole method. The cold pan melts the fat so it can toast the grains, and the broiler brings back the skin that the lid softened over 26 minutes. Next time, look at the pan before the rice goes in. About 2 tablespoons of fat gives you rich, separate grains, while much more makes them greasy and heavy. Keep the rest in its jar for potatoes. On another night, try Marry Me Chicken for a saucier pan dinner, and pack leftover chicken and rice for lunch the next day.
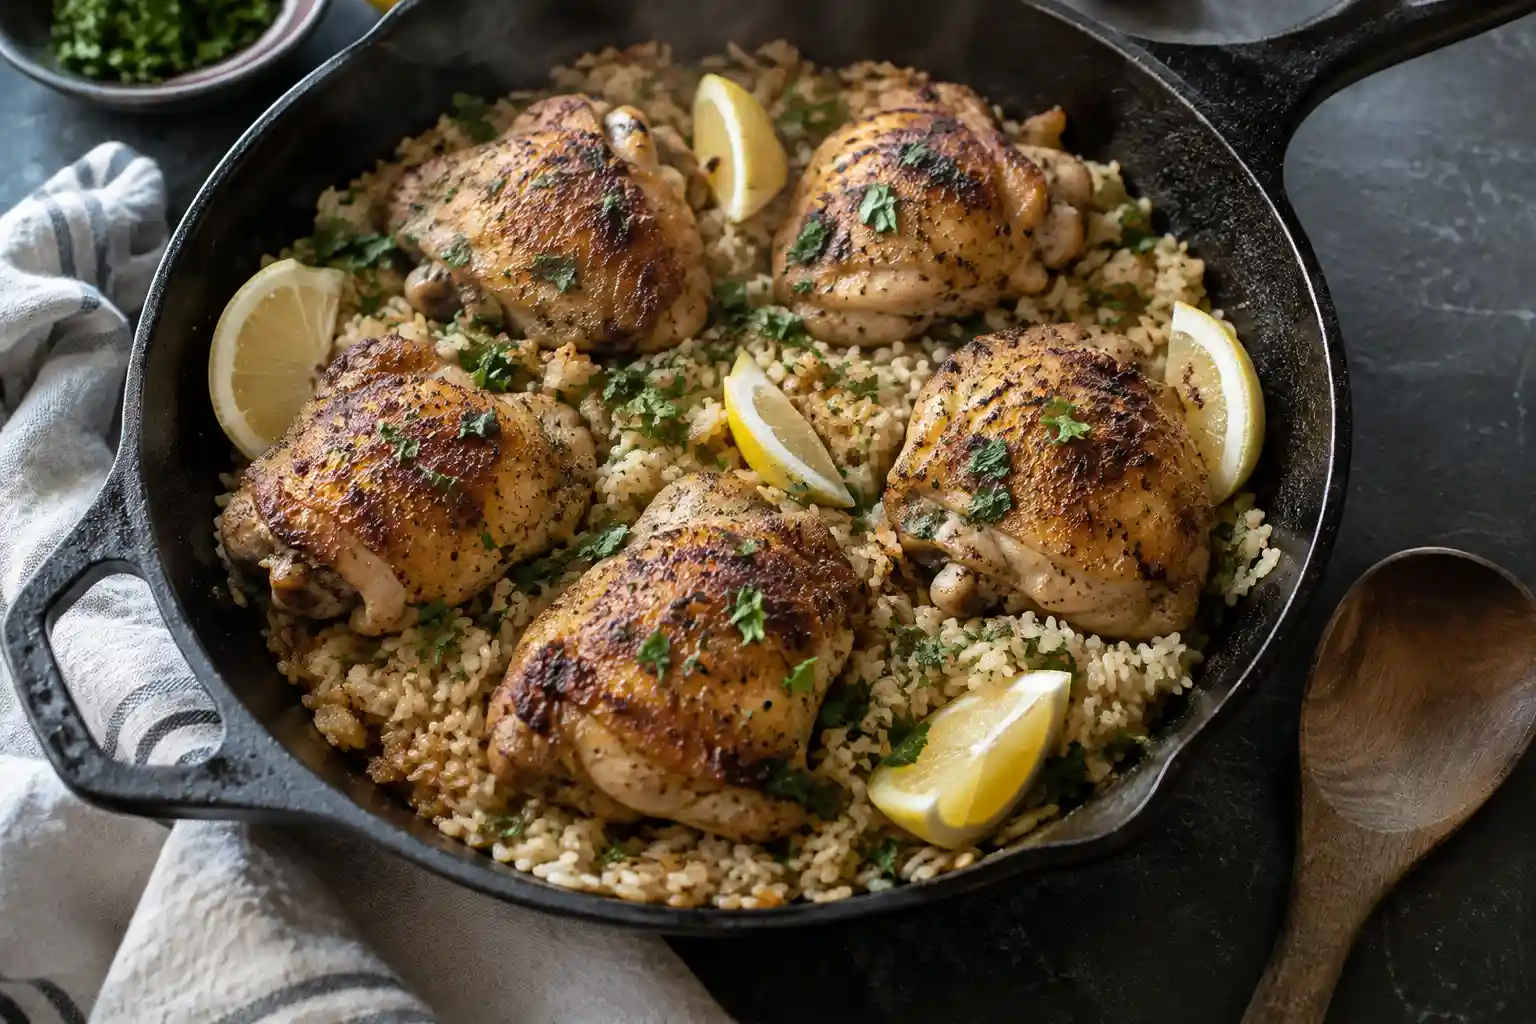

Crispy Skin Chicken and Rice
Ingredients
Method
- Season the thighs and rinse the rice.
- Chop the onion and mince the garlic.
- Render the thighs skin side down in a cold skillet over medium heat for 12 minutes.
- Move the thighs to a plate and pour off all but 2 tablespoons of fat.
- Cook the onion for 4 minutes, then toast the garlic and rice in the fat for 2 minutes.
- Pour in the hot broth and remaining salt. Bring to a boil for 3 minutes, scraping up the fond with a wooden spoon.
- Set the thighs skin side up on the rice and cover the pan. Turn the heat to low.
- Simmer for 16 minutes without lifting the lid.
- Rest off the heat for 10 minutes, then check for 175°F.
- Broil uncovered for 3 minutes until the skin blisters.
- Add the lemon juice and parsley.
- Fluff the rice with a fork and serve from the skillet.